Hosting TFS Hands on Labs in Windows Azure
In today’s post I’m going to go through the process for setting up the TFS Hands on Labs (HOLs) in Windows Azure.
The TFS Hands on Labs are great resources for learning the latest features in TFS. The latest TFS 2013 labs can be found here on Brian Keller’s blog.
I choose to use Windows Azure so that I can share the labs with my colleagues. I have an MSDN Subscription through work that gives me $150 (£130) of Azure credit a month, so I don’t have to worry too much about paying for all this.
Overview
My initial attempts to upload the VHD into Azure fell flat when I downloaded the 13GB RAR archive, unpacked it to a whopping 55GB VHD and then tried to upload to Windows Azure. My poor 2MB cable internet just wouldn’t cut it and the estimate was at least a week to upload, as well as that I was been severely throttled by my ISP.
So I came up with a cunning workaround to save my bandwidth:
- Setup a “Downloaded” VM on Windows Azure.
- Download, unpack and re-upload the VHD on the “Downloader” VM in Windows Azure.
- Create a VM for the Hands on Lab and mount the VHD.
Prerequisites
To follow this guide you will need a Windows Azure account and a basic understanding of Consoles (Command Prompt / PowerShell) and know a little bit about setting up Windows Servers.
1. Creating a “Downloader” VM
The first thing you need to do is create a “Downloader” Virtual Machine on Windows Azure to perform the download, unpack and re-upload process. Once you have completed this process and you have your Labs up and running you can delete this “Downloader” VM to save your money.
- Login to your Windows Azure Portal.
- Select Virtual Machines and Click “+ New”.
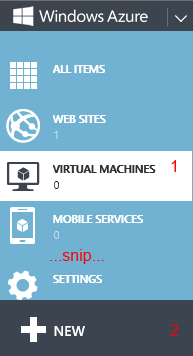
- “Quick Create” a new Medium spec. VM. Select a data centre in the region closest to you.

- Windows Azure will have a think for a couple of minutes and your new VM should appear.
- When the status turns to “Running”, select it from your VM list and click the “>< Connect” button at the bottom of the screen.
- This will download a remote desktop profile for your VM and you can login using the username and password you supplied.
2. Downloading, unpacking and re-uploading the VHD
These next steps will be performed on the new VM over remote desktop.
- The first thing you need to do is download and install the Free Download Manager (FDM) tool.
- I found it easier to download this on my local PC and then browse to it through the mapped remote desktop drives on the VM and copy it up. Internet Explorer on servers is annoyingly secured.
- Once you have FDM installed, run it and import the list of URLs from Brian’s blog post.
- This will take sometime to download, so now’s a good time to get a cup of tea.
- Once the download is completed. Run the “VisualStudio2013.Preview.part01.exe” file on the server and click through the options to start the extraction. I did this on a Small VM and it took even longer than the download (that’s why I am suggesting a Medium VM).
- Whilst it is unpacking now is a good time to get the “Downloader” VM and Windows Azure setup ready to upload the VHD.
2.1 Preparing to Upload a VHD to Azure.
- First, grab a copy of Web Platform Installer and install it on the Server. Again, you may want to download it locally and copy it up to bypass Internet Explorer.
- Open Web Platform Installer and install “Windows Azure PowerShell” along with any dependencies.
- Open up PowerShell and run the following commands:
Set-ExecutionPolicy RemoteSigned
Import-Module "C:\Program Files (x86)\Microsoft SDKs\Windows Azure\PowerShell\Azure\Azure.psd1"
- This will setup PowerShell with all the Azure CmdLets.
- Get a copy of your Publish Settings file from Azure using this PowerShell command. This opens up a browser window to download a file (again I did this locally and uploaded it).
Get-AzurePublishSettingsFile
- Now you have your Publish Settings file you need to import them and select your subscription using the following PowerShell commands:
Import-AzurePublishSettingsFile 'C:\SubscriptionName-8-27-2013-credentials.publishsettings'
Set-AzureSubscription 'SubscriptionName'
- Replace SubscriptionName with the name of your subscription.
- Finally, verify the settings with the following command. You should see your subscription details listed.
Get-AzureSubscription
2.2 Creating your Storage
Now that you have PowerShell ready, you need somewhere to upload the VHD to on Azure.
- Head back to the Windows Azure Portal.
- On the left hand side, select Storage and click “+ New”.
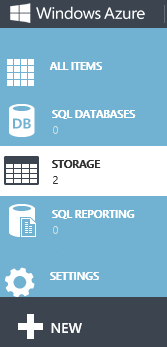
- Click “Quick Create”. Give it a name and select the same region as the Downloader VM.
- Once Azure has created the Storage, you need a Container.
- Select the storage you have just created, and navigate to the “Containers” tab and click “Add” at the bottom.
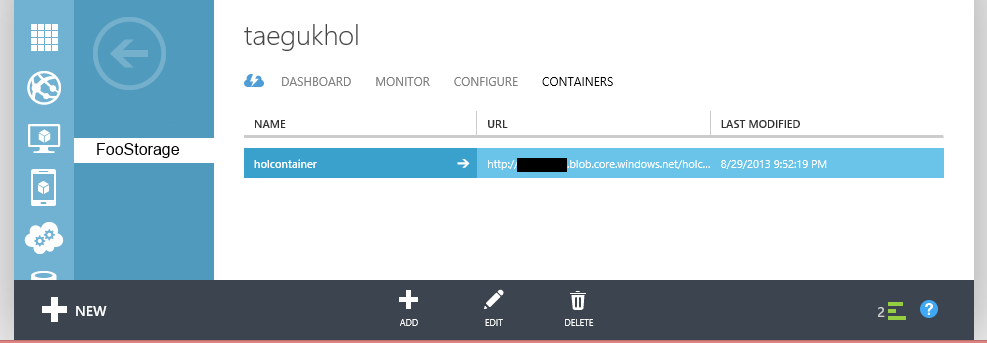
- Give the Container a name and leave the access as “Private”.
- You now should have everything setup to upload the VHD
2.3 Uploading the VHD
- Back on the Downloader VM, wait for the installer to complete, this may take some time.
- Now that the installation is complete you can start the upload process.
- To upload the VHD you need 2 pieces of information, the source and destination.
- The source will be something like:
C:\Downloads\Visual Studio 2013 Preview\WMIv2\Virtual Hard Disks\TD02WS12SFx64.vhd– where C:\Downloads is where you let FDM download the files to.
- The destination you can get from the Azure Portal and will be something like:
http://storagename.blob.core.windows.net/containername/TD02WS12SFx64.vhd– where storagename **and **containername are the names of your storage and container.
- In PowerShell on the Downloader VM run the following PowerShell command:
Add-AzureVhd
- And supply the Destination and LocalFilePath (Source) when prompted.
- This upload will take a few hours, so keep and eye on the progress – I left mine overnight.
- When this is complete, you can create your Hands on Lab VM.
3. Creating the Disk and Hands on Lab VM
Now you should have everything you need to create your Hands on Lab VM.
- Head back to the Windows Azure Portal again.
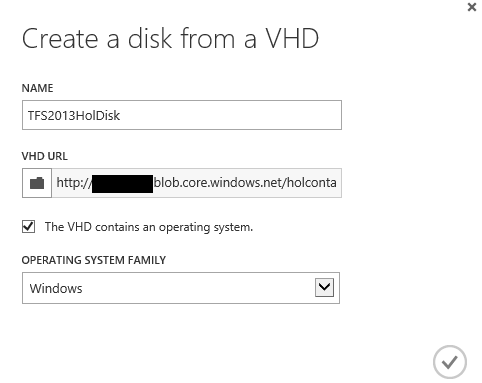
- Go to “Virtual Machines” and select the “Disks” tab at the top.
- Click “Create” and give your Disk a name and browse to the VHD in your storage container.
- Once your Disk is created go back and create another Virtual Machine.
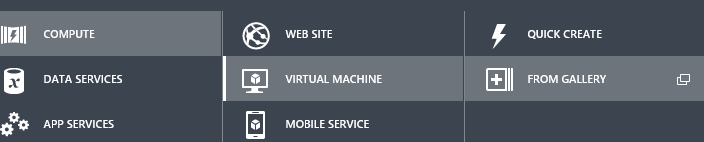
- This time, don’t use “Quick Create”, instead select “From Gallery”
- When you use “From Gallery” you will see an option on the left that says “My Disks”.
- Select you Disk that you just created and click “Next”.
- Fill in the rest of the options for creating a Large VM (a medium also might work).
- Keep filling in the form until the end. Your VM will be created and start provisioning.
- When this VM is and the status is “Running”, you are good to go.
- Click on the “>< Connect” button for the new VM and you should be able to login as “Administrator”. The password is in the “Working with the Visual Studio 2013 ALM Virtual Machine” document that comes with the VM.
Final Steps
It is recommended that you secure the VM from the outside world – this Windows Azure VM is on the internet. So change the Administrator password and disable RDP access for any of the user accounts that don’t need it.
Conclusion
Setting up this VM was fun and a great excuse to learn the Windows Azure platform. Remember you can delete the Downloaded VM and any associated artefacts (except the TFS HOL HVD) when you have done with it.
If you have any questions or comments, please contact me and I’ll do my best.
Associated Links / Credits
Here are a few links I used to pull all this together, if you’re stuck you might find something useful there.